
So, what exactly is fiber optics construction? It's the entire end-to-end process of designing, installing, and firing up the physical network that carries data at the speed of light. This is a complex, specialized field that takes a project from initial route mapping all the way to splicing hair-thin glass strands together, creating the superhighways that our modern world runs on.
The Blueprint for Building Tomorrow's Networks
Building a fiber network is a lot like constructing a national highway system, but for data. It demands meticulous planning, precise engineering, and a highly skilled workforce to forge those reliable, high-speed connections we all depend on. The entire lifecycle can be broken down into a series of clear, manageable stages, providing a roadmap for telecom carriers, data center operators, and municipalities looking to expand connectivity.
From start to finish, the key to keeping a project on track and on budget is a firm grasp of construction project management best practices. These principles are what help you juggle all the moving parts, from timelines and costs to coordinating multiple crews and stakeholders.
At a high level, the whole effort boils down to three core phases.
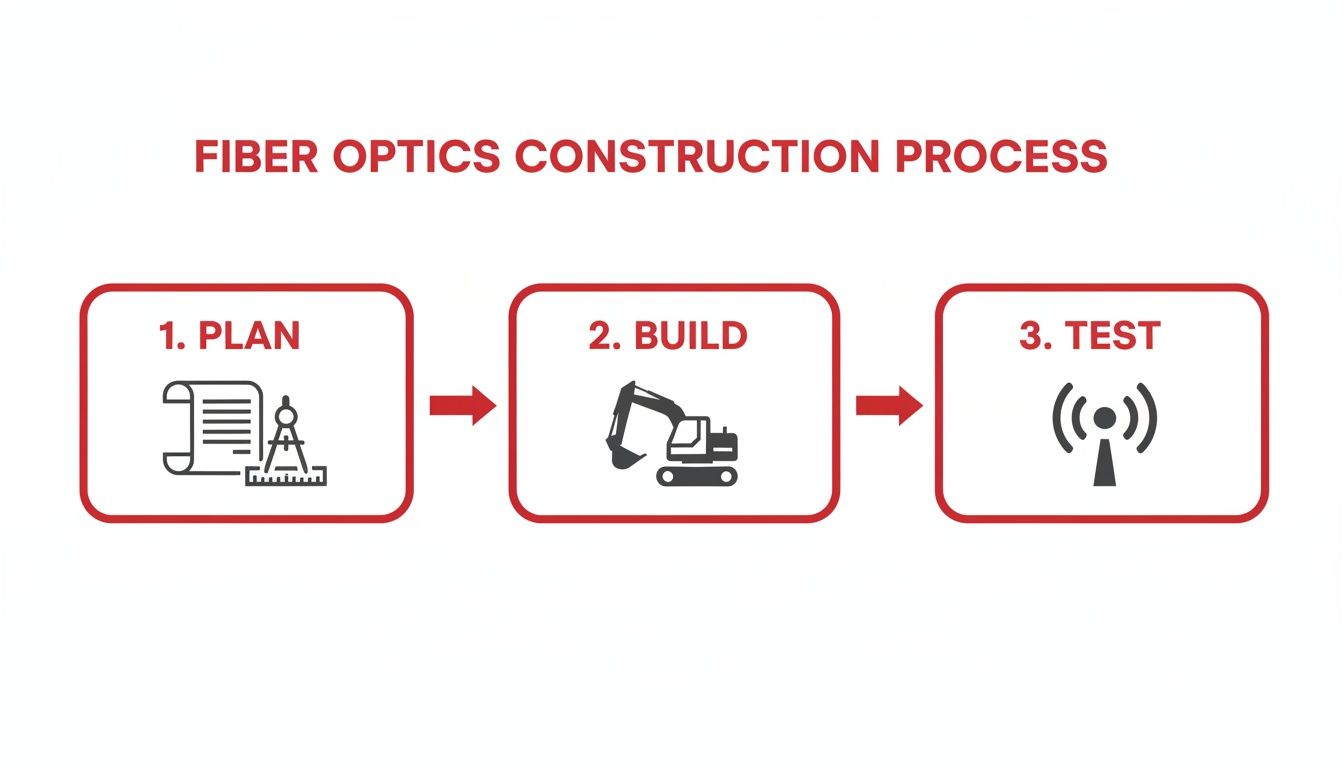
This simple breakdown shows how each step logically flows into the next—starting with strategy and planning, moving into the physical build, and wrapping up with rigorous quality testing.
Understanding the Market Drivers
The demand for this work isn't just steady; it's exploding. The global fiber optics market is on track to hit USD 11.48 billion by 2026. This incredible growth is fueled by our non-stop need for faster, more dependable data transmission.
The telecom sector is still the biggest player, making up 43.73% of the market, as our appetite for streaming, e-commerce, and cloud computing just keeps growing.
At its core, fiber optics construction is not just about laying cable. It's about building the foundational infrastructure that enables economic growth, digital equity, and future technological advancements for entire communities.
This guide will walk you through every critical piece of a successful fiber build, including:
- Initial network design and route selection
- Navigating right-of-way and permitting hurdles
- Executing make-ready work for aerial and underground paths
- Mastering installation, splicing, and testing protocols
- Ensuring long-term reliability through documentation and maintenance
Planning and Designing a Future-Proof Fiber Network
The success of any fiber construction project is locked in long before the first shovel hits the ground. This initial planning and design phase is where the real work happens—it's the strategic heart of the network, a blueprint that will dictate costs, timelines, and whether the network can stand the test of time. It’s all about balancing today's needs with the foresight to build something that can handle decades of future demand.
This stage is a journey from the 30,000-foot view down to the nitty-gritty details. It kicks off with demand forecasting—getting a real sense of population density, business growth, and potential subscriber "take rates" to figure out just how much capacity the network needs. A city planner wouldn't build a two-lane road for a major metropolis, and a network designer can't build a low-capacity network for a thriving tech hub.
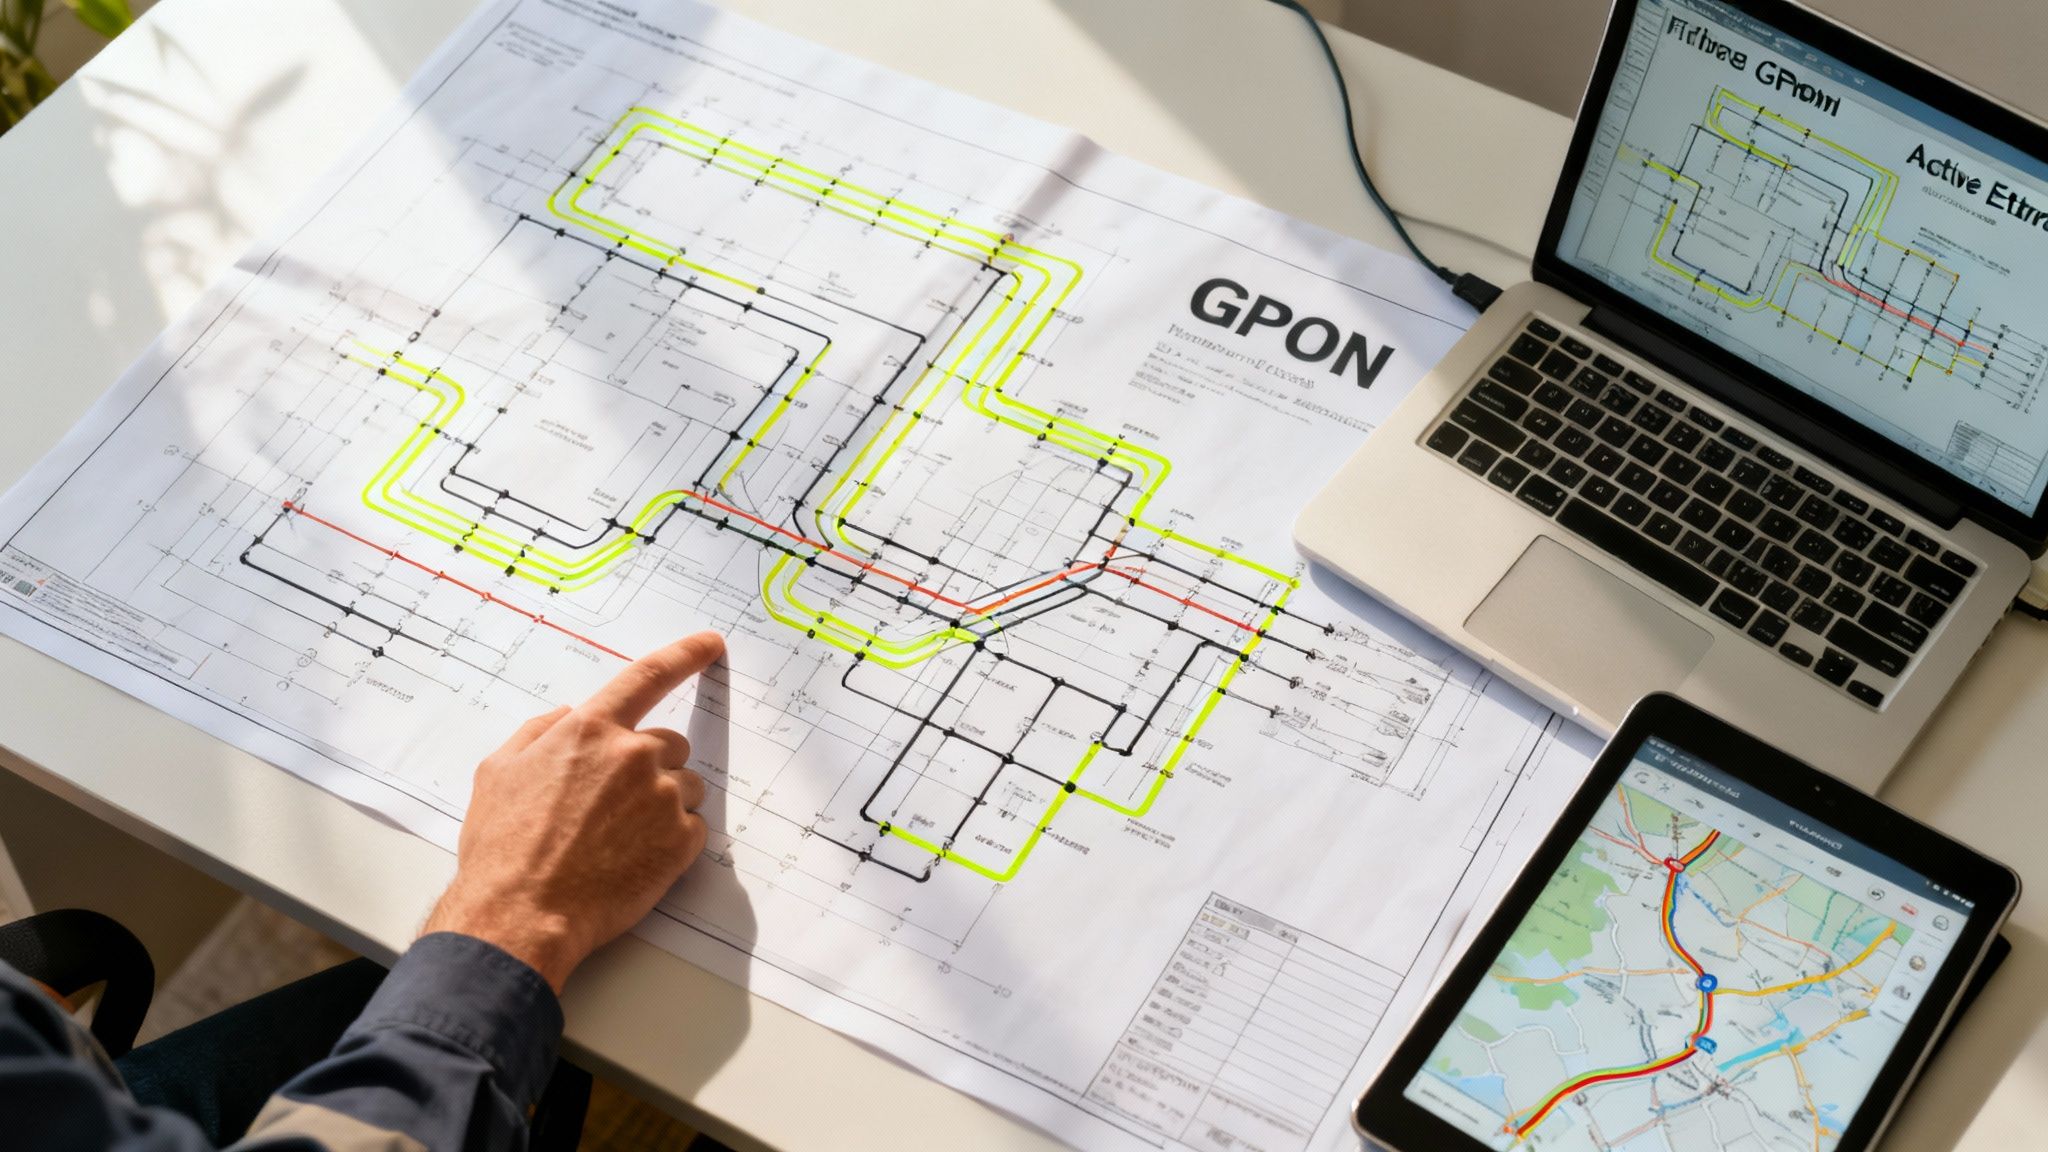
Choosing the Right Network Architecture
One of the first big decisions you have to make is what core network technology to use. This choice ripples through the entire project, affecting everything from equipment costs to how easily the network can grow. The two most common architectures you'll see are Passive Optical Network (PON) and Active Ethernet (AE).
- Gigabit Passive Optical Network (GPON): Think of this as a point-to-multipoint setup. A single fiber from a central office can serve dozens of end-users by using passive, unpowered splitters to divide the signal. This makes it incredibly cost-effective for residential neighborhoods and small business districts.
- Active Ethernet (AE): This is a true point-to-point architecture. Every single customer gets their own dedicated fiber line all the way back to the central office. It’s more expensive—you need more fiber and more powered equipment—but it delivers symmetrical, guaranteed bandwidth that enterprise clients and data centers demand.
Ultimately, the choice comes down to who you're building for. A city-wide Fiber-to-the-Home (FTTH) project will almost certainly lean on GPON for its efficiency. A business park, hospital campus, or data center corridor, on the other hand, will likely need the dedicated performance that only Active Ethernet can provide.
Mastering Route Selection and Engineering
Once the technology is picked, the real-world puzzle begins: mapping the physical path of the fiber. This is so much more than just drawing the shortest line between two points on a map. Engineers have to get their boots on the ground, conducting detailed field surveys and feasibility studies to find the most efficient and least disruptive path forward.
It's a delicate balancing act involving several key factors:
- Minimize Distance: It’s simple, really. Shorter routes mean less cable and lower material costs.
- Avoid Obstacles: You have to navigate around rivers, major highways, historic districts, and environmentally sensitive areas. Every obstacle adds complexity and cost.
- Use Existing Infrastructure: Why reinvent the wheel? Leveraging existing utility poles for an aerial build or empty conduits for an underground run can slash construction costs and timelines.
- Ensure Long-Term Access: The route has to be accessible for future maintenance and repairs. A cable buried under a new building is a nightmare waiting to happen.
This detailed engineering process results in the low-level design (LLD), a comprehensive set of construction documents that calls out every single conduit, splice point, and piece of equipment.
The ultimate goal of route selection is to find the path of least resistance—not just physically, but financially and administratively, too. A well-planned route saves a ton of time, reduces the impact on the community, and prevents costly surprises once construction starts.
Navigating the Maze of Permitting and Right-of-Way
You could argue that the most time-consuming part of fiber planning has nothing to do with engineering and everything to do with paperwork. Before a single crew can mobilize, the network owner must secure the legal right to build on and across public and private land. This is known as Right-of-Way (ROW) acquisition.
At the same time, you're chasing a stack of permits from all sorts of governing bodies. We're talking municipal public works departments, county road commissions, state departments of transportation, and sometimes even federal agencies if your route crosses protected lands or waterways. The complexity here can stall a project for six months or longer if you’re not prepared.
Clear communication and good relationships with these agencies are absolutely critical to keep the project from grinding to a halt. Understanding these administrative hurdles is a massive part of managing the budget, and for a closer look at this, you can find great information on what makes up the total costs of fiber construction on southerntierresources.com. A solid plan that accounts for this bureaucracy is the final piece of the puzzle, paving the way for a smooth transition from design to deployment.
Preparing the Path for Fiber Installation
Once the network maps are approved and the permits are in hand, the real work begins. This is where the project moves from paper to the physical world in a critical phase called make-ready work.
Think of it as the foundational prep work before the main event. You wouldn't build a house on an unprepared lot, and you can't install fiber optic cable without first clearing and securing the path. This stage is all about proactively tackling potential obstacles to ensure the actual construction is smooth, safe, and efficient. It's about mitigating risk before a shovel ever hits the ground or a bucket truck goes up.
The specific tasks look completely different depending on one key factor: whether you're going aerial or underground. Each path presents its own unique set of challenges.
Clearing the Way for Aerial Construction
When you're stringing fiber on existing utility poles, the make-ready process is a careful blend of engineering and negotiation. You can’t just find an empty spot and hang your cable.
First, every single pole on the route needs a thorough structural analysis. Engineers have to calculate the current pole loading—the combined weight and tension from all existing power lines, coax cables, and other attachments. They then determine if each pole can handle the added weight of the new fiber cable, especially under worst-case scenarios like heavy ice or high winds.
If a pole is already at capacity, is too old, or shows signs of damage, it has to be replaced. This involves close coordination with the pole owner, which is usually the power company or another telecom provider. That process alone can add significant time and cost to a project.
The main steps in aerial make-ready include:
- Pole Surveys: Documenting every pole's condition, height, and existing attachments.
- Structural Load Calculations: Running the numbers to ensure everything complies with National Electrical Safety Code (NESC) standards.
- Attachment Agreements: Negotiating the legal rights and fees with pole owners to place your cable on their assets.
- Conflict Resolution: Physically moving existing cables around to create a safe, designated space for the new fiber line.
Ensuring Safety for Underground Builds
For underground routes, the focus shifts from the air to the ground beneath our feet. The make-ready process here is all about subsurface safety. That hidden world is a maze of electric lines, gas pipes, water mains, and sewer systems. Hitting one isn't just a costly mistake; it's extremely dangerous.
That’s why the "Call Before You Dig" protocol (dialing 811) is always the first step. This alerts local utilities, who then send out crews to mark the approximate location of their buried lines with color-coded paint and flags. The details of this process are absolutely critical, which you can learn more about here: https://southerntierresources.com/goodscode/underground/4278858686.
But those paint marks are just an estimate. To be certain, crews perform potholing (or daylighting). This means carefully digging a small test hole—often with a non-destructive hydro-vacuum excavator—to physically expose a utility line and confirm its exact depth and position before any major trenching starts.
And of course, before breaking ground, it’s essential to post all proper construction site signage requirements to keep the public safe and stay compliant with local regulations.
The demand for this kind of detailed groundwork is exploding. The global fiber optic connectivity market is projected to hit USD 4,194.6 million by 2026, with hardware like cables and connectors making up over 75% of that total. Europe is leading the charge with a 35% market share, fueled by massive industrial and smart city initiatives. This incredible growth highlights just how important it is to get these foundational make-ready steps right.
Core Construction Methods for Fiber Deployment
With the path cleared and the poles prepped, we get to the most visible part of any fiber build: laying the actual glass. This is where the blueprints and plans turn into a physical network, and crews get to work putting fiber in the ground or up in the air.
The method we choose isn't a shot in the dark. It’s a strategic call based on the local environment, the project budget, and frankly, how much disruption the community can tolerate. You wouldn’t use a backhoe to cross a river, and you don’t string aerial cable through a historic district with buried utilities. It's all about picking the right tool for the job.
Placing Fiber Beneath the Surface
Burying fiber optic cable is often the gold standard. It keeps the network safe from storms, falling trees, and vehicle accidents. It's an out-of-sight, out-of-mind approach, but the way you get it underground can vary dramatically in cost and impact.
Traditional Trenching and Plowing
The most old-school method is exactly what it sounds like. We dig a trench, place the protective conduit inside, and fill it all back in. In wide-open country, we can use a specialized cable plow that slices through the earth and lays the fiber in one smooth, efficient motion. It’s fantastic for undeveloped areas but is messy and highly disruptive anywhere else.
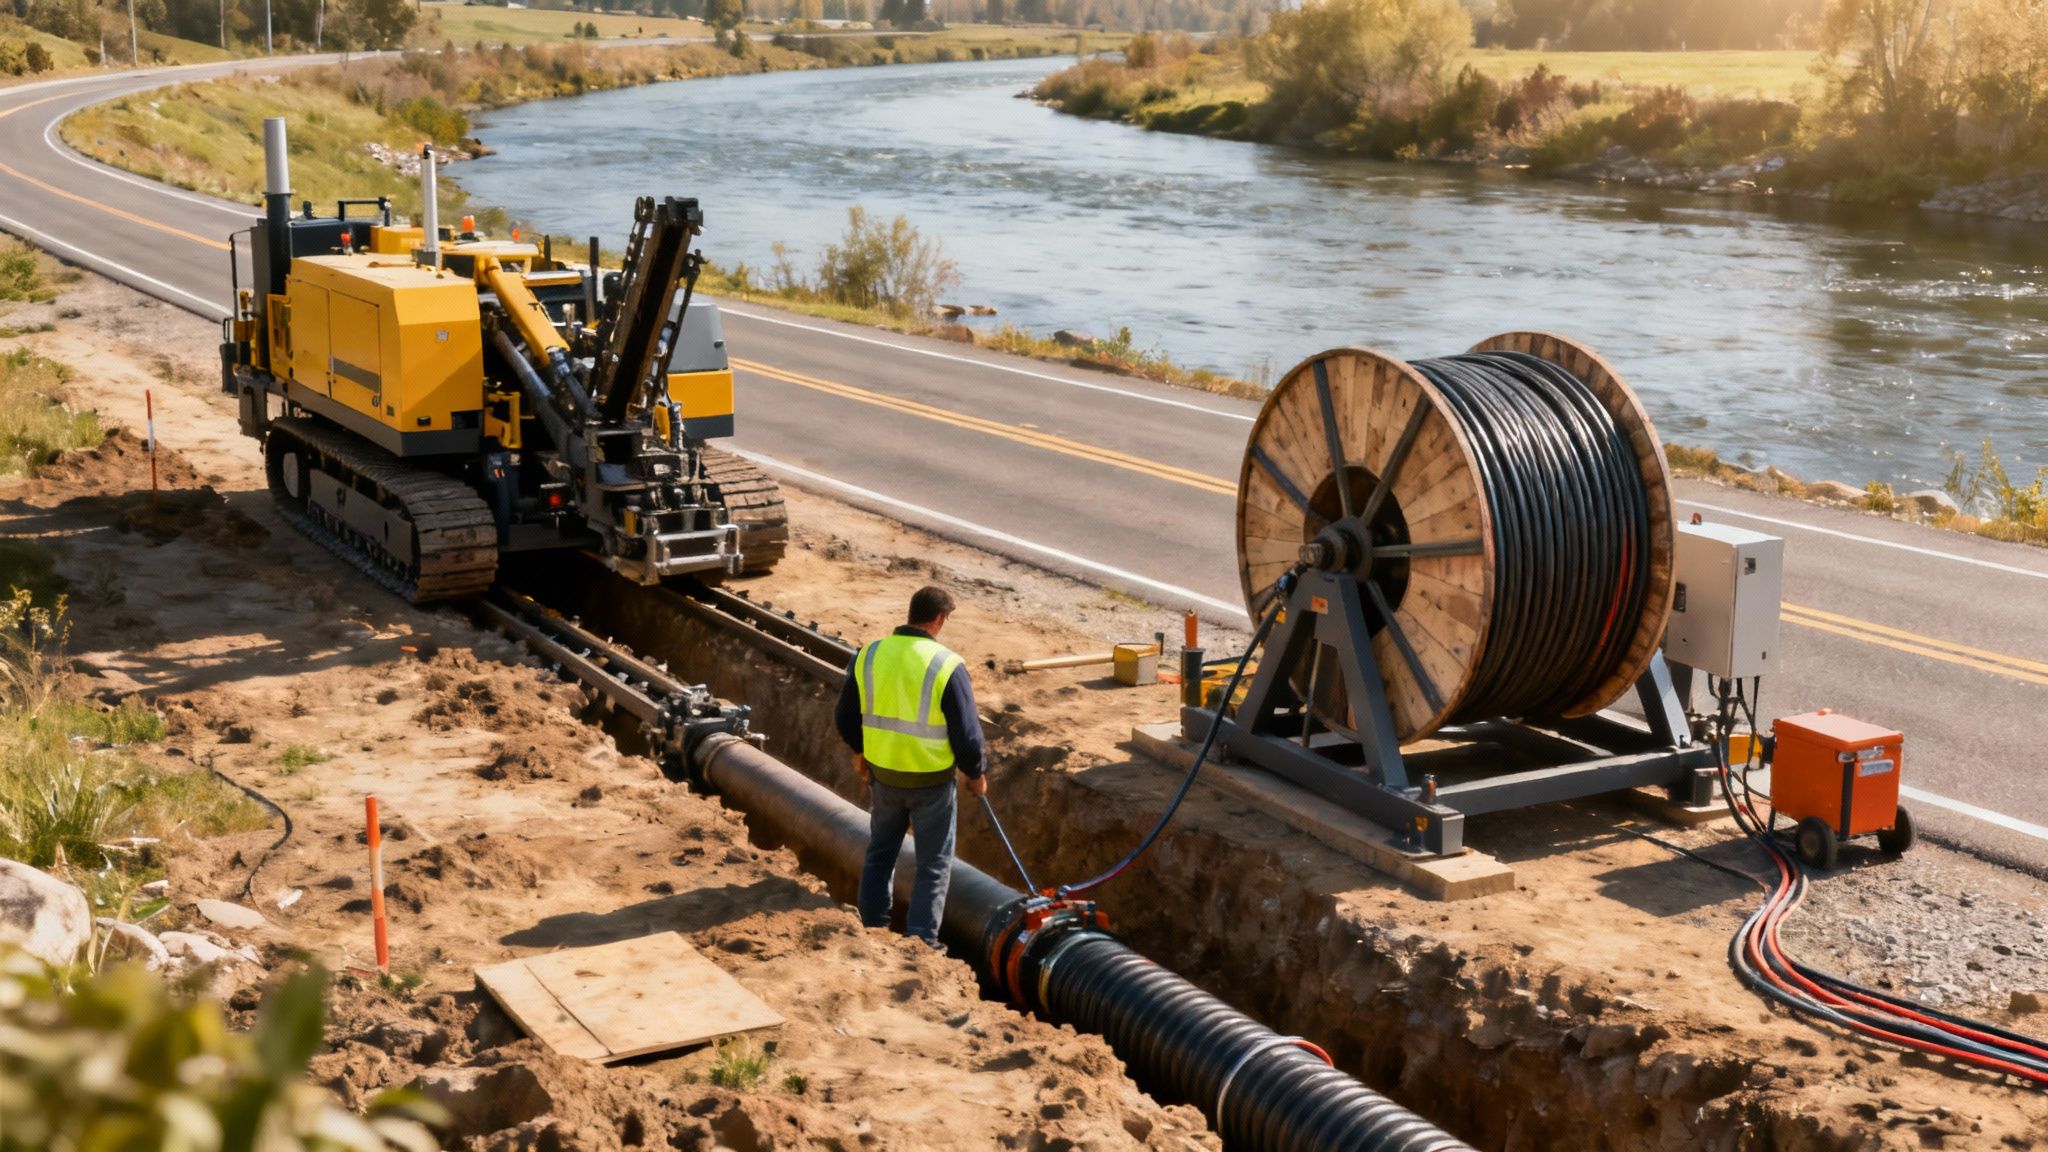
Horizontal Directional Drilling (HDD)
What happens when you hit a major highway, a river, or sensitive wetlands? You can't just dig across. That's where horizontal directional drilling (HDD) comes in. It's a surgical technique where a drill bores a precise path deep under the obstacle, from one side to the other. Once the path is clear, we pull the conduit right through the tunnel. It’s clean, effective, and leaves the surface completely untouched.
Micro-Trenching
In a dense city, digging a four-foot trench is a non-starter. Micro-trenching is the clever, low-impact solution. We use a specialized saw to cut a very narrow and shallow slot—often just an inch or two wide and a few inches deep—right into the asphalt or sidewalk. The fiber goes in, the slot is sealed, and traffic is barely affected.
Taking Fiber to the Skies
Stringing fiber on existing utility poles is almost always faster and cheaper than digging, especially where a pole line already exists. It takes real precision and specialized gear, but it’s a proven method for rapid deployment.
The workhorse of any aerial job is stringing and lashing. First, crews pull a heavy-duty steel support wire, called a messenger strand, and tension it between the poles. The much lighter fiber optic cable is then hoisted up alongside it.
A specialized machine called a "lasher" then spirals a thin wire tightly around both the fiber cable and the messenger strand. This binds them into a single, incredibly strong unit that can handle high winds, heavy ice, and decades of exposure.
Of course, the trade-off is that aerial fiber is exposed to the elements. Storms and pole accidents are a constant threat. But for speed and cost-effectiveness, it’s hard to beat. Using the right tools is non-negotiable here; a high-quality wire puller can significantly improve the efficiency and safety of aerial fiber optics construction.
Choosing the Right Method for the Job
The decision between these methods is a balancing act. We’re constantly weighing speed, cost, public perception, and long-term reliability. In the real world, nearly every project is a hybrid, using a mix of techniques to get from point A to point B.
| Construction Method | Best Use Case | Key Advantage | Main Disadvantage |
|---|---|---|---|
| Plowing/Trenching | Open, rural, or undeveloped areas | Lowest cost for long, straight runs | Highly disruptive to existing landscape |
| Directional Drilling | Crossing rivers, highways, obstacles | Minimal surface disruption | Higher cost and technical complexity |
| Micro-Trenching | Dense urban cores and city streets | Fast and low-impact in paved areas | Not suitable for unpaved or poor surfaces |
| Aerial Lashing | Areas with existing utility poles | Rapid deployment and lower initial cost | Vulnerable to weather and pole damage |
Think about connecting a new subdivision. We might start with directional drilling to get under the main highway. From there, we could switch to a traditional trencher to run the mainline down the undeveloped entrance road. Finally, to connect each home, we’d use a smaller, less invasive machine to avoid tearing up established lawns and driveways. This practical, multi-tool approach is what modern fiber construction is all about.
The Art and Science of Fiber Splicing and Testing
Once the physical fiber optic cable is in the ground or on the poles, it’s still just a dark, silent strand of glass. Bringing the network to life means connecting each of those individual fibers, a process that’s part meticulous craft and part high-tech science. This is where the real precision work in fiber optics construction begins.
Imagine trying to perfectly align and join two strands of glass, each one thinner than a human hair. The goal is to get them so perfectly matched that light can pass between them with almost zero interruption. That's the core challenge of fiber splicing. A bad splice acts like a kink in a garden hose—it chokes the flow, degrades the signal, and leads to slow speeds and unreliable service for everyone downstream.
This incredible demand for precision and skilled technicians isn't just a local need; it's a global phenomenon. The Asia Pacific region has exploded into the fastest-growing market for fiber infrastructure, thanks to massive nationwide projects. China's market alone is expanding at a staggering 12.8% CAGR, with providers installing roughly 1.425 million 5G base stations by March 2022 to keep up. You can see more data on this incredible expansion and learn about the fiber optic market's growth trajectory on geo-tel.com.
Mastering Splicing Techniques
Out in the field, technicians rely on two main methods for joining fibers together, each suited for different situations.
Fusion Splicing: This is the gold standard, the best-in-class method for permanent connections. Using a specialized machine called a fusion splicer, a technician carefully aligns the two fiber ends. The machine then zaps them with an electric arc, melting the glass and permanently fusing them into a single, seamless strand. The result is a connection with incredibly low signal loss, making it absolutely essential for the mainline network backbone.
Mechanical Splicing: This approach uses a small, self-contained device that lines up the fibers and holds them perfectly in place with an index-matching gel. It’s a much faster process and doesn't require a pricey fusion splicer, which makes it perfect for quick, temporary repairs or for connecting the final subscriber drop where speed of installation is more critical than absolute long-term performance.
A great fusion splice is truly an art form. The goal is to create a connection with a signal loss of less than 0.05 decibels (dB)—a nearly flawless transition that is virtually invisible to the light pulses traveling through it.
Verifying Network Integrity with Testing
After every splice is made, it has to be rigorously tested. You can’t just assume the connection is good; you have to prove it. This is where specialized testing equipment becomes a network builder’s most trusted tool.
The workhorse for this job is the Optical Time-Domain Reflectometer (OTDR). Think of it as a sophisticated radar for the fiber line. The OTDR shoots a powerful pulse of light down the fiber and then meticulously analyzes the light that reflects back from every point along the way.
By measuring the timing and strength of these reflections, the OTDR can:
- Pinpoint the exact location of a splice and measure its signal loss.
- Detect any breaks, sharp bends (macrobends), or crushes in the cable.
- Measure the total length of the fiber run with incredible accuracy.
This process gives you a complete "birth certificate" for each fiber strand. It verifies that the entire line, from the central office all the way to the endpoint, is clean, clear, and ready to deliver high-speed data without a hitch. This final step is what separates a truly well-built network from a constantly problematic one.
Tying It All Up: Documentation, Handoff, and Future-Proofing

Getting a fiber optics construction project across the finish line isn't just about lighting up the network. The real final phase is about building a smooth transition from construction to long-term operations, ensuring the network you just built becomes a reliable, manageable asset for decades. This crucial stage revolves around meticulous documentation, final site cleanup, and smart maintenance planning.
It’s tempting to declare victory the moment the last circuit tests green. But skipping the proper closeout process is a classic mistake that creates massive headaches down the road. This final push is what truly protects your investment and sets the network up for a long and healthy life.
The Make-or-Break Importance of As-Built Documentation
One of the single most valuable things to come out of any construction project is the as-built documentation. These aren't the plans you started with; they are the final, definitive maps showing exactly how the network was installed in the messy, unpredictable real world.
Think of as-builts as the network's official birth certificate and user manual rolled into one. They capture all the on-the-fly changes and critical details that the original design couldn't possibly predict, like a small route change to avoid a buried utility line or the exact GPS coordinates of a newly placed splice enclosure.
These documents are absolutely vital for:
- Emergency Repairs: When a backhoe causes a fiber cut at 2 a.m., as-builts tell the on-call technician precisely where the conduit is, turning a potential multi-day outage into a few hours of work.
- Future Upgrades: Planners can confidently use as-builts to find spare conduit capacity or design network extensions without having to re-survey the entire route.
- Damage Prevention: Providing accurate maps to "call before you dig" services and other utilities is the best way to prevent someone else's construction project from taking your network down.
Accurate as-built documentation is the single most important handoff from the construction team to the operations team. It transforms raw infrastructure into a manageable, maintainable, and scalable asset.
Site Restoration and Leaving a Good Impression
Once all the heavy equipment is gone, the last job on-site is a thorough restoration. This means putting everything back the way you found it—or even better. Every patch of grass, every sidewalk square, and every farm field needs to be meticulously restored.
This isn't just about looking good; it's about maintaining goodwill with property owners and the community. A clean and professional restoration shows you respect their property and your commitments. That kind of trust is invaluable when you need to secure permits or easements for your next project. It's the final handshake that leaves a lasting positive impression.
Common Questions About Fiber Optics Construction
Even the most meticulously planned fiber project will throw a few curveballs. Below, we've tackled some of the most common questions we hear from telecom pros, city planners, and data center teams to help you navigate the process.
What Are the Biggest Cost Drivers in a Fiber Project?
It’s not the fiber itself. By far, the biggest expenses are labor and civil works, which can easily eat up 60-80% of the total project budget. The construction method is the real budget-breaker. Trenching a line through a congested downtown corridor is a completely different financial ballgame than plowing cable across an open field.
Other major costs to watch out for include:
- Permitting and Right-of-Way: The administrative side of securing legal access can be a long and expensive journey, especially when you're dealing with multiple jurisdictions.
- Make-Ready Engineering: If you're building an aerial network, the costs for pole surveys, load calculations, and potential pole replacements can add up fast.
- Environmental Obstacles: Hitting unforeseen challenges like river crossings, solid rock, or protected wetlands often requires specialized—and more expensive—techniques like directional drilling.
How Long Does a Typical Fiber Build Take?
This is the classic "it depends" answer. A straightforward fiber drop to a single business might be wrapped up in a few weeks. A city-wide Fiber-to-the-Home (FTTH) network, on the other hand, is a multi-year marathon.
A lot of people are surprised to learn that the pre-construction phase is almost always the longest part of the project. The design, engineering, and especially the permitting can easily take 6 to 18 months before a single shovel hits the ground.
What Is Dark Fiber Versus Lit Fiber?
This really comes down to control. Dark fiber is just the raw glass infrastructure—the installed fiber optic cable with no active electronics lighting it up. Companies often lease or buy dark fiber to build their own private, highly secure networks where they control all the equipment.
On the other side, lit fiber is a turn-key service from a carrier. They "light" the fiber with their own gear and sell you a specific amount of bandwidth. It’s a smart move during construction to lay down extra dark fiber strands for future growth or to lease out to other organizations.
Why Is As-Built Documentation So Important?
Think of as-builts as the final, definitive map of your network—exactly how it was installed in the real world. This documentation shows precise cable depths, splice locations, and any on-the-fly changes made from the original design.
This isn't just paperwork; it's mission-critical. When an outage happens, accurate as-builts mean you can find a fiber cut in hours, not days. Without them, you're just guessing. Good documentation also makes future upgrades smoother and helps prevent other crews from accidentally digging into your network down the road.
At Southern Tier Resources, we provide the end-to-end expertise needed to manage every phase of your fiber optics construction project, from initial design and permitting to meticulous testing and as-built documentation. Learn how our skilled crews and proven processes can ensure your network is built for reliability and performance.